Step-by-step guide to creating your first complete project.
This is an example of a project for a very common scenario of an application with some COM DLLs. A large fraction of in-house business applications and many shrink-wrapped programs fall into this category.
For this project we will use example files installed by the Manifest Maker setup into the Examples folder. If you did not install examples, please do so now.
It is helpful, although not required, to read Step-by-step guide to creating your first manifest before reading this chapter.
Create a working directory for this example. For this text we will assume it
is C:\Temp\sxs32mm\.
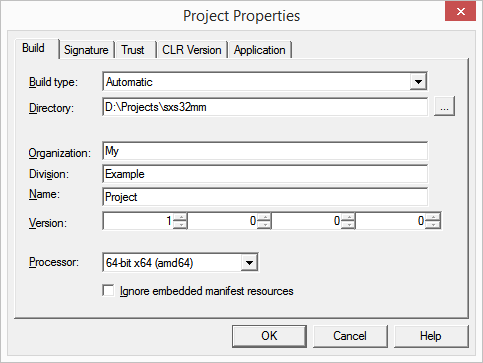
Run Manifest Maker. In the Side-by-Side project properties dialog choose Build Type: Automatic. Type in the project directory name in the Directory field.
Note that the fields below the Directory are now unprotected. These seven fields constitute Assembly Identity. The assembly name consists of Organization, Division and Name.
The documentation states that names should be three part as in:
Microsoft.Windows.GdiPlus
. In fact Microsoft itself sometimes does not
follow this rule, for example:
Microsoft.MSXML2
. Manifest Maker requires that at least one of these
fields must be non-empty, but we suggest you follow the documented Microsoft
recommendation of using three part names.
Type in the three name fields. For the purpose of this example we use My,
Example and Project
.
The next four fields are the manifest version: major, minor, build and revision. Major and minor version changes indicate incompatible versions, build and revision changes indicate compatible versions. For this example we use 1, 0, 0 and 0.
Click OK:
Open the Examples folder (normally C:\Program Files\Maze Solutions\Manifest Maker\Examples)
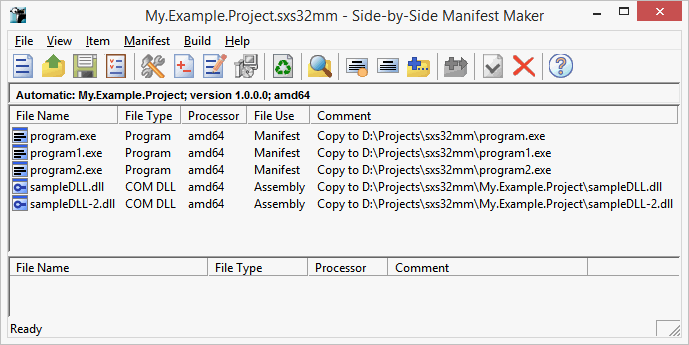
using Windows Explorer. Drag all files from the
Examples\Project2 folder to the top list view in the Manifest Maker main
window:
Click the build button  on the toolbar.
After a brief period of activity you will be presented with the following
window:
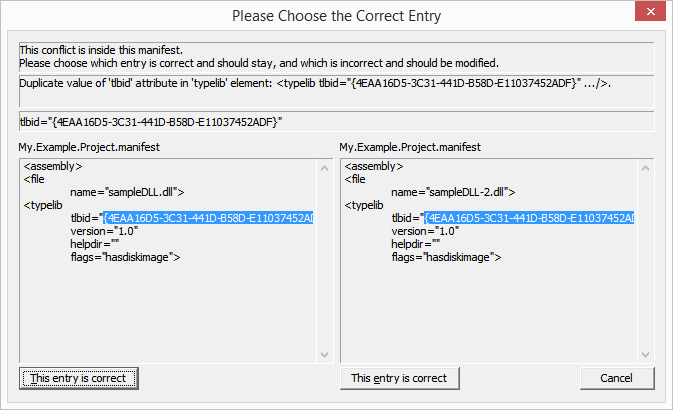
This window indicates that Manifest Maker found a conflict between the included
DLLs and needs you to make a decision. More information on resolving conflicts
are provided elsewhere. For now let us choose the right side - we state that the
DLL named in the right side of the window is the one that should be used to
obtain this type library.
A moment later the build process is finished. It is a good idea to
save the project now. For the purpose of this example we will save the project
file in the project directory - in our case C:\Temp\sxs32mm\:

We are finished building this example.
Let us look in the project directory:
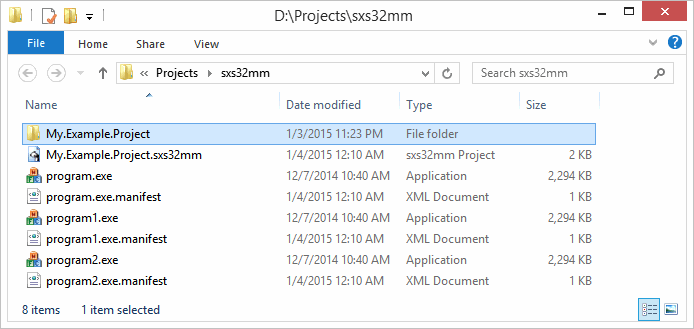
All three programs are in the project target directory. There is also a
.Manifest for each program and the project file we just saved a moment ago.
There is also a new subdirectory: My.Example.Project:
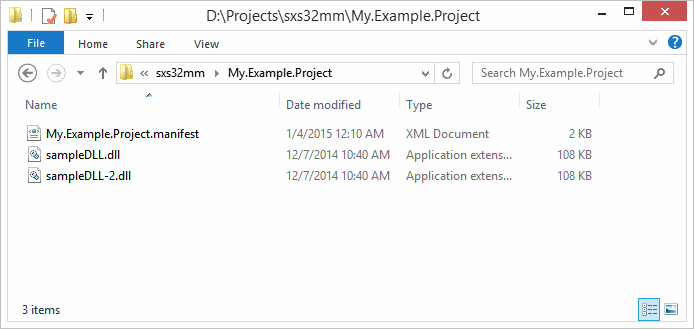
This folder contains the two DLLs we used in our project and another .Manifest
file.